How to Make Your Own CBD Gummies at Home
In this comprehensive guide, we’ll walk you through everything you need to know to make your own CBD gummies at home.

CBD gummies have become a popular way to enjoy the benefits of cannabidiol (CBD) in a tasty, convenient form. Whether you’re looking to manage stress, improve sleep, or simply enjoy a delicious treat, making your own CBD gummies at home is easier than you might think. Not only does this allow you to control the ingredients and dosage, but it also ensures you’re consuming a product free from unnecessary additives. In this comprehensive guide, we’ll walk you through everything you need to know to make your own CBD gummies at home.
Why Make Your Own CBD Gummies?
Before diving into the recipe, let’s explore why you might want to make your own CBD gummies instead of buying them from a store.
- Control Over Ingredients: Store-bought gummies often contain artificial flavors, colors, and preservatives. By making your own, you can use natural, high-quality ingredients.
- Customizable Dosage: Everyone’s CBD needs are different. Homemade gummies allow you to tailor the dosage to your specific requirements.
- Cost-Effective: Making CBD gummies at home can save you money in the long run, especially if you consume them regularly.
- Fun and Creative: Crafting your own gummies is a fun DIY project that lets you experiment with flavors and shapes.
What You’ll Need to Make Your Own CBD Gummies
To make your own CBD gummies, you’ll need a few essential tools and ingredients. Here’s a list to get you started:
Ingredients:
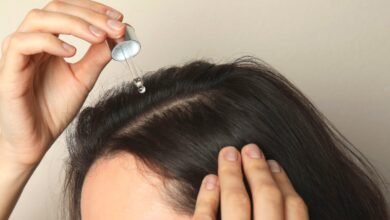
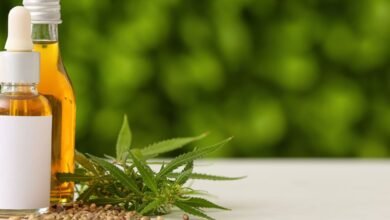
- CBD Oil or Tincture: Choose a high-quality, full-spectrum or broad-spectrum CBD oil for the best results.
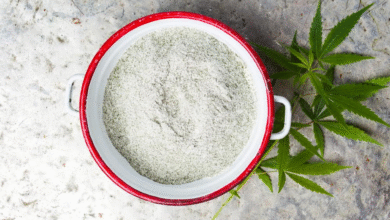
- Gelatin: This is the base of your gummies, giving them their chewy texture.
- Fruit Juice: Use your favorite natural juice for flavor. Popular options include orange, apple, and berry juices.
- Sweetener: Honey, agave syrup, or stevia can be used to sweeten your gummies.
- Citric Acid: This adds a tangy flavor and acts as a natural preservative.
- Optional Add-Ins: You can add natural food coloring, vitamins, or other supplements for extra benefits.
Tools:
- Silicone Mold: Choose fun shapes like bears, hearts, or stars to make your gummies more appealing.
- Saucepan: For heating and mixing your ingredients.
- Whisk or Spoon: To ensure your mixture is smooth and well-combined.
- Dropper or Pipette: For precise filling of the molds.
- Refrigerator: To set your gummies.
Step-by-Step Guide to Make Your Own CBD Gummies
Now that you have everything you need, let’s dive into the step-by-step process to make your own CBD gummies.
Step 1: Choose Your CBD Oil
The first step is to select a high-quality CBD oil or tincture. Look for products that are third-party tested and free from harmful additives. The potency of the oil will determine the dosage of each gummy, so choose one that aligns with your needs. For example, if you’re new to CBD, start with a lower concentration.
Step 2: Prepare Your Ingredients
Measure out all your ingredients before you begin. This will make the process smoother and ensure you don’t miss anything. For a basic recipe, you’ll need:
- 1 cup of fruit juice
- 2-3 tablespoons of gelatin
- 1-2 tablespoons of sweetener
- 1/2 teaspoon of citric acid
- 1-2 milliliters of CBD oil (adjust based on your desired dosage)
Step 3: Heat the Fruit Juice
Pour the fruit juice into a saucepan and heat it over low to medium heat. Avoid boiling the juice, as high temperatures can degrade the CBD and reduce its effectiveness. Warm the juice until it’s just hot enough to dissolve the gelatin.
Step 4: Add Gelatin and Sweetener
Slowly whisk in the gelatin, ensuring it dissolves completely. This step is crucial for achieving the right texture. Once the gelatin is fully dissolved, add your sweetener and citric acid, stirring until everything is well-combined.
Step 5: Incorporate the CBD Oil
Remove the saucepan from the heat and let the mixture cool slightly. This is important because adding CBD oil to a very hot mixture can reduce its potency. Once the mixture has cooled, stir in your CBD oil until it’s evenly distributed.
Step 6: Fill the Molds
Using a dropper or pipette, carefully fill your silicone molds with the mixture. Take your time to avoid spills and ensure each mold is filled evenly. If you’re using multiple flavors or colors, you can create layered gummies by letting one layer set before adding the next.
Step 7: Set the Gummies
Place the filled molds in the refrigerator for at least 30 minutes to an hour. This will allow the gummies to set and firm up. Once they’re fully set, gently pop them out of the molds.
Step 8: Store Your CBD Gummies
Store your homemade CBD gummies in an airtight container in the refrigerator. They should last for up to two weeks. For longer storage, you can freeze them and thaw as needed.
Tips for Perfect CBD Gummies
- Experiment with Flavors: Don’t be afraid to mix and match juices or add natural extracts like vanilla or mint for unique flavors.
- Adjust Dosage: If you’re unsure about the right dosage, start with a small amount of CBD oil and gradually increase it in future batches.
- Use Natural Colors: Add a pop of color with natural ingredients like beet juice (for red) or spinach juice (for green).
- Avoid Overheating: High temperatures can degrade CBD, so always keep the heat low when preparing your mixture.
Benefits of Making Your Own CBD Gummies
When you make your own CBD gummies, you’re not just creating a tasty treat—you’re also reaping several benefits:
- Healthier Option: By using natural ingredients, you can avoid the artificial additives found in many store-bought gummies.
- Cost Savings: Homemade gummies are often more affordable than their commercial counterparts.
- Customization: You can tailor the flavor, texture, and dosage to suit your preferences.
- Satisfaction: There’s a sense of accomplishment in creating something from scratch that’s both delicious and beneficial.
Frequently Asked Questions About Making CBD Gummies at Home
1. How much CBD should I use per gummy?
The amount of CBD per gummy depends on the potency of your oil and your desired dosage. For example, if you’re using a 1000mg CBD oil and making 20 gummies, each gummy will contain approximately 50mg of CBD.
2. Can I use CBD isolate instead of oil?
Yes, you can use CBD isolate powder. Simply dissolve it in the warm fruit juice before adding the gelatin.
3. How long do homemade CBD gummies last?
When stored properly in the refrigerator, homemade CBD gummies can last up to two weeks. For longer storage, freeze them.
4. Are homemade CBD gummies as effective as store-bought ones?
Yes, as long as you use high-quality CBD oil and follow the recipe carefully, homemade gummies can be just as effective—if not more so—than store-bought options.
Conclusion
Learning how to make your own CBD gummies at home is a rewarding and practical skill. Not only do you get to enjoy a delicious, customizable treat, but you also have full control over the ingredients and dosage. Whether you’re a CBD enthusiast or a beginner, this DIY project is a great way to incorporate CBD into your daily routine. So, gather your ingredients, follow the steps outlined above, and start creating your very own CBD gummies today!
By taking the time to make your own CBD gummies, you’re investing in a healthier, more personalized way to enjoy the benefits of CBD. Plus, it’s a fun activity that can be shared with friends and family. Happy gummy-making!